
A novice gardener may find the task of starting a vegetable garden daunting. Learning the fundamentals of gardening and succeeding in your gardening pursuits, on the other hand, can be simple. For optimal growth and harvests, vegetables require excellent soil.
The cornerstone of your entire garden is well-prepared soil, and it provides you a head start on the season! Gardening does not begin with the planting of a seed. It all begins with the dirt.
Without rich, soft soil that allows the roots to grow deep enough to absorb nutrients, you can’t have healthy, productive plants.
How To Prepare Soil For Gardening Vegetables
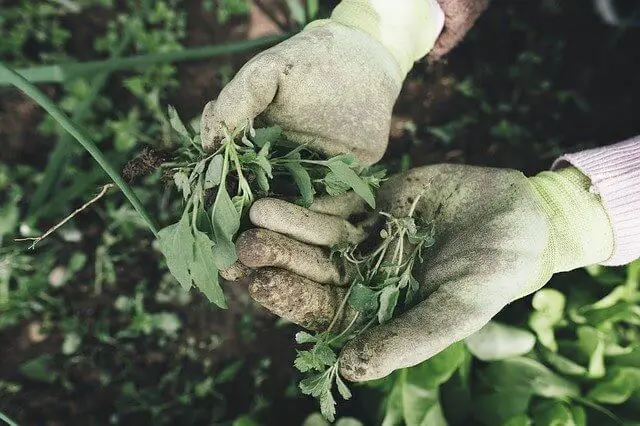
1# Weeding
If you’re starting a vegetable garden, there’s a good chance your soil is overrun with weeds.
If you already have a vegetable garden, it will be overrun by undesired plants at the beginning of the growing season. In any case, you’ll need to remove the weeds to ensure that the space is ready for your future harvests.
Once the weed seedlings have sprouted, pluck them out or use a hoe to eliminate them. Instead of digging up the soil, which will bring more weed seeds to the surface, simply remove the ones that are already there.
Gardening will be “easier” the rest of the year and every year once you’ve established a foundation of deep, dark, productive soil.
Read also: 7 Unique Vegetable Gardening Ideas
2# Analyze the soil and make amendments if necessary
If you have the means, you can analyze the soil during the fall when you’re removing the beds. Perform a soil test to determine the type of soil you’re dealing with. Many plants will be too dry in the soil if there is too much sand, whereas certain veggies will be too damp if there is too much clay.
A nice combination of earth, sand, and clay is ideal for vegetable planting. Depending on the results of the test, you may need to supplement your soil with a little of what it lacks to attain the right balance.
Using a shovel or a garden fork, dig up the dirt to a depth of 12 to 14 inches. If you have a rototiller, now is the time to get it out and put it to work.
You can work in a three- to four-inch layer of compost, rotted manure, or other additions needed during this period.
Continue to clear any debris, such as pebbles and stones, that you may come across. Rake the earth till it’s as level as you can get it. The final product should be loose, well-aerated soil that drains effectively.
3# Tilling
Tilling is an excellent method for breaking up the soil, incorporating soil additives, and correcting nutrient or pH imbalances. It’s crucial, however, not to go overboard.
When dry weather follows rain, repeatedly tilling the same soil produces a fine, powdery dust that dries up and packs firm like concrete.
This may seem self-evident, but you should never till moist soil. In the spring, ambitious gardeners may try to “work” the soil before it is ready.
This is not only unsightly, but it can also harm the soil’s structure, preventing future plant growth. Before working the soil, give it a chance to dry out a little.
Read also: Learn About The Types Of Vegetable Gardening
4# Fertilize the soil with organic fertilizer.
Now is the time to add the valuable plant food that will help your crops grow optimally and provide numerous harvests once the soil has been cleansed, tilled, and better balanced.
For vegetable planting, we prefer organic fertilizers, but ordinary fertilizers are still an alternative.
Distribute the bags uniformly throughout the freshly plowed and mixed ground. Break open the bags and dump the contents on top of the mattresses.
Spread fertilizer with a rake and work it into the ground with a shovel, piercing the soil at least six inches deep into the cultivated soil you prepared in the first few steps.
Work the fertilizer into the soil with a rake and a shovel, rotating the dirt with the shovel and smoothing out the surface with the rake.
It is important that when adding fertilizer, always follow the directions on the bag to avoid burning your plants or harming your soil.
5# Continue to add compost to the mix.
Patience is essential in the world of gardening. If you don’t have enough prep time, there are always ways to get around it and still succeed. It’s not the end of the world if you decide to plant after only one season of preparation.
You’ll simply need to conduct some work in between growing seasons to restore the soil to the nutrient-rich levels required for optimal crop growth.
Compost should be added as soon as possible so that it has time to break down before the next spring arrives.
Organic resources such as manure or compost serve to nourish your soil while also lowering its pH. Compost may also aid in the drainage of all types of soil, ensuring that your plants remain healthy.
Begin by spreading a 2-inch (5.1-centimeter) layer of compost on top of the soil and mixing it in with your shovel. You can put in up to an additional 2 inches if you want to (5.1 cm). [9]
Compost can be purchased from gardening stores or made from scratch. If you make your own, avoid putting any animal or meat items in the compost bin because it will harm your plants.
However, after adding compost or manure, test the pH of your soil to see if any additional amendments are required.
How To Fertilize Soil for A Vegetable Garden?
Before planting, spread dry fertilizer (1 pound per 100 square feet of garden or 100 feet of row) over the entire garden plot. After that, side-dress the plant rows.
The fertilizer should be applied 2–3 inches to the side of the seed level or plant row, and 12 inches below it.
How To Prepare Soil For Planting Vegetables In The Garden?
If you’re going to utilize your garden soil, make sure to improve it first. Peat moss improves the texture of the soil and adds organic matter.
Drainage is improved by working on perlite or coarse sand. One part garden soil, peat moss, and either perlite or coarse sand is a nice mix for your pots.