
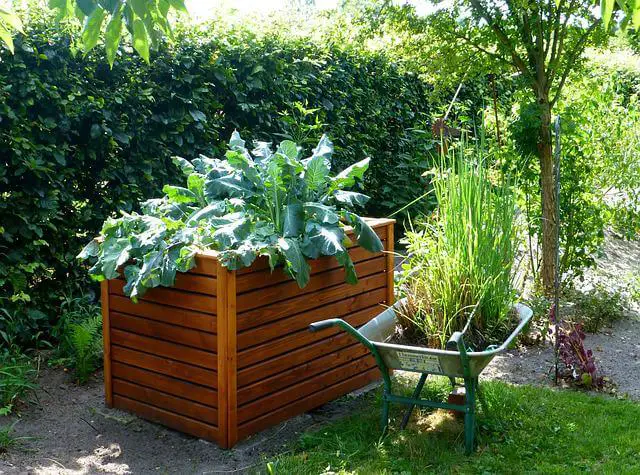
The advantages of raised beds in your garden are undeniable. Plants can also be grown on raised beds indoors. You can put them on your balcony, patio, deck, porch, lawn, or garden because they are simply moveable. The biggest advantage you get from them is that they keep the soil fertile.
As you may fill your raised bed with high-quality potting mix, compost, and fertilizer, you can modify the level of nutrients according to the needs of your plant.
Raised beds come in a variety of shapes and sizes and can be purchased from any garden store or firm.
How To Build A Raised Garden Bed With Sleepers
1# For your raised garden bed, use the proper timber sleepers
There are many different varieties of sleepers on the market, each with its own set of qualities. The type of wood you use for your raised bed is an important consideration. Some are designed for home usage, while others are rustic and have rough trimmed edges.
Railway sleepers that have been reclaimed have a dark tint and a worn appearance. They can be quite heavy and difficult to handle, as well as contain potentially harmful compounds.
For this project, we recommend utilizing fresh timber sleepers that are constructed from the same wood and treated with the same procedure as our other garden goods, so they mix in nicely with fence panels, pergolas, or decking, and are backed by our industry-leading 25-year guarantee.
Another alternative is to use Jakwall® landscaping timbers. We recommend that you utilize new timber sleepers that are in good condition.
Sleepers for the British Pine Railway have been added to the fleet.
Railway sleepers in a new French style
Sleepers from the Jarrah Railway in Australia were used. Sleepers from the African Azobe Railway.
2# In your garden, decide where you want to put your raised bed
While they provide you a lot of freedom in terms of where you build your bed, make sure it’s in a bright, open place. You should also check for overhanging trees that could prevent precipitation from reaching your beds.
It’s also a good idea to put beds near hedges or semi-permeable fencing so that filtered air can flow through. The placement of the raised bed is critical; it is determined not only by your preferences but also by the needs of your plants.
New wood sleepers are so heavy, that you’ll almost certainly need assistance moving them into place. To build in-situ for ease, we recommend setting up your cutting station as close as feasible to your desired area and having your tools available.
Using Sleepers To Construct An Elevated Bed
It is not difficult to construct a raised bed at home; it is a simple task. You can make a low-cost raised bed if you follow all of the instructions outlined in this article.
1# Select the appropriate size for your raised bed
As we are creating a rectangle raised bed, each layer of this form of raised bed can be constructed with three sleepers.
One sleeper must be cut in the center and the remaining two sleepers must be used as a whole. This is the standard size for a raised bed, but you can adjust it to fit your needs.
For example, we’re utilizing sleepers that are 2.4 meters long and can be reduced to the size you need for your raised bed. Any cut ends should be preserved using Jakcure® End Grain Preservative.
For a single layer, you’ll need four different components in total. In this case, there are two entire sleepers and two halves.
You can also create a raised bed in the shape of a square; for this, you’ll need four sleepers for each layer.
The raised beds’ height and weight are entirely up to you. Keep in mind that the size that is ideal for your plants should be chosen.
You can easily access your plants and maintain the raised bed if the width is less than the length, the width should be less than the length.
However, you are unable to care for the centered plants in a squared shape, they are ignored and do not grow well.
2# The railway sleepers should be laid out on the ground
To make one layer, need three sleepers. The middle of one is taken out, while the other two are used whole. Place the railway sleepers on the ground to create the layer.
The majority of people simply lay these sleepers on the ground, but a concrete foundation is preferred.
3# Connect the sleepers
To join the sleepers, use two 150mm timber screws in each corner. To create a solid connection, drill 50mm of the screw length into the adjoining sleeper. You’ll now have a nice border created by a box shape.
You can leave it like this, but it will only be 7.87 inches tall from the ground, so we recommend adding another layer for added height and intrigue. As a result, the total depth would be around 400mm (15.75 inches).
4# Add a new layer
Lay each of the sleepers individually on top of the box you’ve made, overlapping the connections like bricks. Create one corner, then screw it together to secure it before continuing with the rest of the sleepers to form a rectangle shape.
5# Assemble the layers
Drill down from the top to secure the two layers together with 250mm long timber screws.
Alternatively, brackets on the interior might be used to link the two layers. Then you can repeat the procedure till you reach the appropriate height.
What To Line Sleeper Raised Beds With?
Lining your raised bed with landscaping fabric, polythene, or a permeable membrane before filling it with soil is another popular option for added durability. Secure the liner to the edges of the bed with heavy-duty staples and a staple gun before clipping the excess away.
How Many Sleepers Do I Need To Make A Raised Bed?
The number of sleepers you’ll need depends on the form of your raised bed, but for ours, which is arguably one of the simplest, you’ll need six: four on each side and two halves at each end.
The following supplies will be required for your raised beds: Sleepers – whichever type you choose, as long as they’re all the same length.