
You must have been familiar with compost and its effect on the soil in our previous articles, however, have you heard of vermicomposting? What does it mean and how can you use it on your soil? In this article, we’ll learn about that.
Vermicomposting often referred to as worm composting, is the act of obtaining worms that consume natural materials such as vegetable and fruit peels and subsequently digest them.
The crumbs move through their system and are excreted as worm castings. Before you become too grossed out, keep in mind that those castings are a nutrient-dense material that may transform soil into a plant’s heaven. (It’s also known as black gold!)
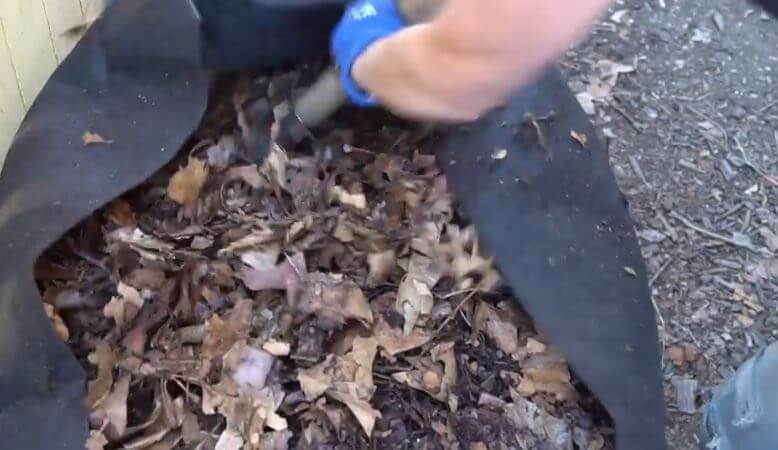
To begin, simply fill the worm bin with a mixture of green and brown food scraps as well as “bedding” such as shredded paper, cardboard, straw, hay, dry leaves, mud, or wood chips.
Benefits Of Vermicompost
The following are some of the merits of vermicompost.
- It feeds the soil with nutrients.
- It improves the soil’s ability to store nutrients in a form that plants can use.
- It enhances the structure of the soil’.
- In heavy clay soils, it increases aeration and internal drainage.
- It improves the ability of sandy soils to hold water.
- It has a large number of helpful bacteria.
Read also: Can You Compost Onions?
Best Worms For Vermicomposting
The following are some of the best worms used for vermicomposting:
Red wigglers are one of the most commonly used vermicomposting worms. “They are a wonderful choice for many sections of the country since they can withstand a wide range of temperatures,” Randaci explains.
If you reside in a colder climate, though, you may encounter European nightcrawler worms. “They prefer lower temperatures and can be found a little deeper in the soil,” he explains, adding that “they reproduce more slowly than red wiggler worms but create more biomass (final product).”
You can also check into Indian blue worms and African nightcrawlers, but Randaci warns that they are “better suited to tropical conditions.”
How To Vermicompost
The following are steps taken on how to Vermicompost.
Choose a location for the worm bin in your home
The ideal worm bin locations maintain a steady temperature and moisture level. As a result, you must keep it away from an oven, heater, air conditioner, or vent.
Read also: Can You Compost Pineapple?
Purchase a worm bin
Worm bins are vermicomposted containers that have already been assembled. It can be found in a variety of gardening and organic supply stores. If you don’t want to buy a worm bin, a 20-gallon storage container will suffice. Make sure it’s completely opaque to keep light out.
Drill holes in the bin to allow air to flow through
There will be air holes in a pre-made worm bin, but if you buy a storage container, you will need to use a power drill to cut 12-inch holes in the bottom, sides, and lid of the bin. In the bin, drill about 20 holes.
Mount the bin on blocks and cover it with plastic
Get two bricks, two wood pieces, or something else to protect the bin from falling to the ground. Place a large piece of plastic in the part of the house where the worm bin will be. Place the blocks/woods on top of the plastic and the bin on top of the blocks.
Make bedding out of newspaper or corrugated cardboard
Worms require moist bedding, which is best provided by newspaper and cardboard. Shred enough newspaper or cardboard to fill an 8-inch-high bin.
Fill the bedding with water and soak it
Worms require moisture to survive as well as to breathe, so make sure the bedding is humid before adding the worms. A small amount of water should be sprinkled or poured on the bedding. Check to see if all of the bedding is wet.
Read also: Can You Compost Pasta?
Put the bedding in the bin
When the bedding has been thoroughly soaked, spread it evenly on the bin’s base. So that the worms have enough area to settle in, the bedding should fill at least the bottom 8 inches or so of the bin.
On top of the bedding, sprinkle some dirt
Because worms prefer to dwell on soil, putting some dirt in your bin will make them feel more at ease. Take some debris-free soil from the garden or purchase standard potting soil from the garden store. Then evenly distribute it across the bedding.
Cover the soil with a uniform layer of food waste
Distribute the food scraps or rubbish across the soil. Leaves, peels, rinds, cores, and seeds from fruits and vegetables are the greatest food leftovers to use. Crushed eggshells, tea bags, and coffee grounds are also good options.
Wait two weeks after closing the lid. For at least 5 to 10 days, close the bin’s lip properly.
In the bedding, place the worms
Make a hole in the middle of the bedding by opening the worm bin’s cover. Instead of putting the worms across the top, slowly insert them into this hole. This will make the worms feel more at ease.
For every 1000 worms, add around 225g of food per day. If your household produces more waste, you can increase the number of worms in the bin.
After around 6 months, harvest the vermicompost
Every week, check the container to see how much bedding is left. You’ll know it’s harvest time when all of the bedding has been transformed to compost. So put everything to the side and replace the wet bedding. Dig out the compost slowly, but keep the worms in the bin.
Conclusion
I hope you find this article helpful. I would like to hear from you. So, let me know if you have any questions on how to Vermicompost.
References
- Vermicomposting in Solid Waste Management: A Review
- Vermicomposting of different organic materials using the epigeic earthworm Eisenia foetida
- Vermicompost Articles
- Vermicomposting: Tool for Sustainable Ruminant Manure Management