
Black-eyed bean or peas thrives well in soil that is averagely fertile and with a pH that is near neutral. Sow black-eyed peas seeds 1 inch deep. Space planting holes about 2 inches apart in row. While between rows, leave about 25-35 inches apart. When seedlings grow the first set of true leaves, thin them to about 4-inch plant spacing. Water regularly. Make trellis to support your black-eyed bean.
For detailed step by step guide on how to grow black-eyed peas, follow along with this handy guide.
Learn about Black-eyed Bean?
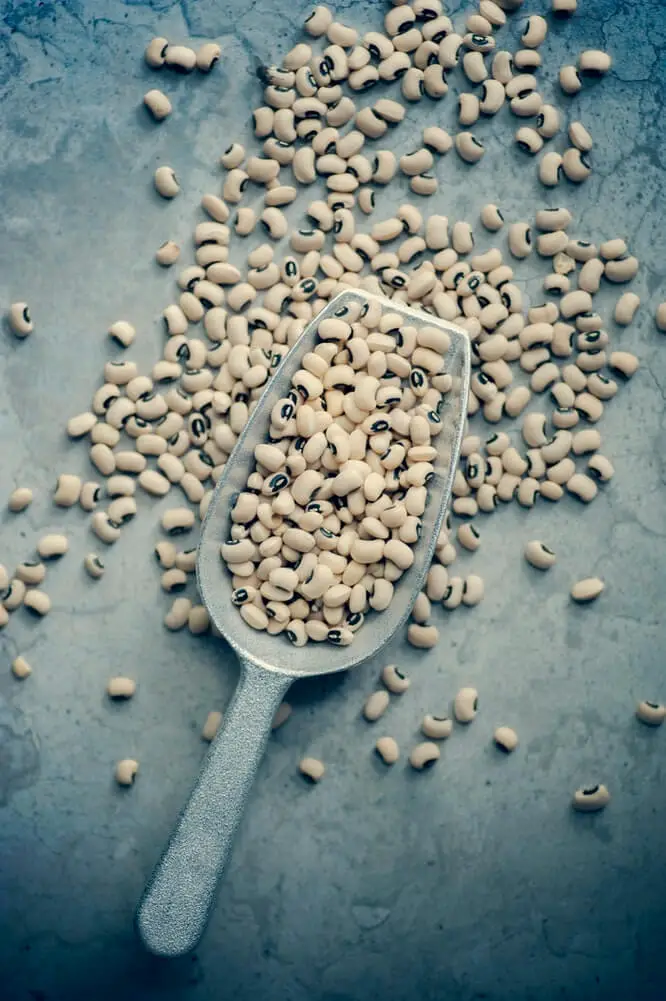
Black-eyed (also known as black-eyed peas) is a common legume mainly grown for its edible bean. It is scientifically known as Vigna unguculata. It is one of the widely cultivated species of legumes in the world, especially around west African countries.
Black-eyed peas is very delicious and also parked with many nutrients and protein. This high protein content makes black-eyed bean popular among different groups of people in the world.
With this basic information about black-eyed peas, let us look at how to grow the plant.
Read also: How To Grow Artichokes From Seeds And Crowns
How to grow black-eyed peas from dried beans
Here is a step by step instructions
Note: if you want to grow in containers, click here
1. Choose the best black-eyed bean variety: growing successful black-eyed is not all about planting at the right time or proper gardening care but choosing and planting the best variety. Find and buy qualt black-eyed peas that is well adopted to your local clamatic conditions.
This variety usually developed resistant to common pests and diseases in your area. You will also find out that this type of variety is well adopted to temperatures fluctuations of your area. This variety can be obtained from local growers in our area. The most widely cultivated variety of black-eyed bean is the bush variety (also known as California black-eyed). This variety doesn’t spread like the vine variety. Bush bean can produce 6-8 inches of pods, and each black-eyed bean can grow up to about 16-18 inches tall, and can also spread to about 10 inches when fully matured.
The other common variety of black-eyed peas that can be gotten in the market is the vine variety. This variety spread on the ground. Despite, they are different, but the soil temperatures, irrigation, gardening care, and fertilizer requirements remain the same. So, you can choose the one that suits your need and space.
Related: How To Grow Caraway Plant From Seeds
2. Choose the right planting time: the next most important step is to plant your black-eyed peas at the right time. Do not plant your seeds during frost unless you are starting them indoors. In this case, start seeds in peat pots or any other compostable material. This is because legumes generally do not tolerate transplanting. And so, when seedlings are reading to be transplanted to the parmanent space outdoors, you can plant them together with pots. You can find peat pots on Amazon.
However, if you want to wait till after all the dangers of last frost have passed, you can plant them outdoors. In this case, wait till when the soil temperature is about 60°F in the spring. The reason for starting seeds indoors early in the spring, is to give you a heads start so that your black-eyed will mature before the extreme heat of summer.
Read also: How To Grow Aubergines From Seeds And Aubergines
3. Choose the right garden spot: the next step is to find a good garden spot. Do not start your garden in a wrong place. Black-eyed peas thrives in soil environment that is moderately fertile and with a pH that is within the range of 5.5 to 6.5. Make sure the place is located in full sun. And it is neither too dry nor waterlogged. In general, the garden spot should be well-ventilated and well-drained.
4. Prepare the garden spot: the next step is to prepare the garden spot. Use your rake and fork to turn the top 10 inches of the garden soil. Loosen the soil very well and remove large rocks, stones, debris, and other off plants. Mix in a well aged all purpose compost. Legumes in general, grow best in rows, so prepare rows that are about 25-35 inches apart.
5. Sow your black-eyed bean: sow black-eyed peas seeds 1 inch deep. Space planting holes about 2 inches apart in rows. While between rows leave about 25-35 inches. When black-eyed peas seedlings grow the first set of true leaves, thin the seedlings to about 4-inch plant spacing. Water everyday but avoid overwatering. Make trellis to support your black-eyed bean.
6. Take care of your black-eyed peas: generally, black-eyed bean is a low maintenance crop, the plant does not require much fertilizer application and watering, especially during the rainy. However, do not leave the garden spot too dry. Water gently when the garden surface becomes dried. Do not feed your black-eyed bean with fertilizer that contains too much nitrogen. Weed timely to reduce competition for nutrients and water.
Read also: How To Grow Asparagus From Seeds And Cuttings
7. Pests and diseases: the common pests of black-eyed peas include root-onot nematodes, leafhoppers, bean beetles, aphids. Management include planting resistant variety, practicing crop rotation, and cultural practices.
While the common diseases of black-eyed peas include bean mosaic virus, Fusarium wilt, powdery mildew. Management include planting resistant varieties, crop rotation, and burning of infected plants.
8. Harvesting your black-eyed bean: you can harvest your black-eyed bean at different stages, depending on what you need. If you are growing for the green leafy vegetable, you can harvest the young tender leaves after the first 5 set of true leaves have appeared.
You can also also harvest young tender leaves about 21 days after the seeds have sprouted. To keep the plant growing, do not harvest more than 1/3 of the leaves at one time.
However, if you are growing for black-eyed bean for beans, wait till all the pods have matured, which normally takes 80-100 days. When fully ripe, the pods will change color from green to pale yellow.
Read also: How To Grow Adzuki Beans From Seeds In 8 Easy Steps
How to grow black-eyed peas in container
You can also grow your black-eyed bean in container. However, this is not recommended until you have a limited space. In this case, you can grow a black-eyed bean variety such as bush. Since this type of variety doesn’t spread much like the vine variety.
Here is a step by step instructions on how to grow black-eyed bean in container:
1. Buy your pots: find a well-drained pots with reasonable sizes. I recommend that you buy ceramic pots. The containers should be at least 12 by 12 inches. You can get them on Amazon.
2. Prepare the containers: fill the containers with potting mixes. However, if you are using garden soil, make sure you sterilize the garden soil. And then, some amendments such compost, sand, dried leaves, and agricultural lime. However, if you can’t find all these, use only compost, garden soil, ground dried leaves, and sand.
The rule of thumb is to ensure that the soil to be put in the pots is moderately fertile and can drain water efficiently. The pH needs also to fall within the range of 6-6.5. Fill the containers with the soil to about 2 inches from the top of the containers. Moisten the soil gently with water before seeds planting.
3. Sow seeds in the containers: sow seeds in the containers 1 inch deep. Sow about 3-4 seeds so that you can thin out the less vigorous ones later. Make sure the eyes of the beans are facing up. Place two stakes in each containers at the opposite direction. Find a sunny spot and keep the containers. Take care of your bean containers garden.
Read also: How To Grow Black Beans From Seeds At Home
How long does it take for black-eyed peas to grow
Under normal climatic conditions, a healthy black-eyed peas can take about 80 to 100 days to reach maturity from seeds planting to harvesting. However, some varieties of black-eyed peas can take more or less days than the stated days.
Black-eyed peas companion plants
The common companion plants that can be grown with black-eyed bean include carrots, turnips, beans, corns, cucumber, and radishes. But, do not grow black-eyed peas with potaty, garlic, and onions.
Recipe ideas: How to use and eat black-eyed bean
You can use your black-eyed bean in salad dressings or Cook them. The young leaves can taken as salad when boiled. While the young tender pods can also be enjoyed as vegetable. The beans can be cooked with rice and consume with pepper soup. The beans can also be grinded or blender with sweet peppers and onions to make moi-moi. This is one of the favorite West African food, especially among the Nigerians.
Conclusion
In this article, I discussed how to grow black-eyed bean. I also looked at how grow them in containers. I hope you will find this article helpful. Let me know if you have any questions.